Showing posts with label Napoleonic Wars. Show all posts

Saturday, February 15, 2020

Maida 1806 reprised; Shadow of the Eagles

Last Thursday evening Ken and I played a game of the 1806 battle of Maida using Keith Flint’s work-in-progress rules Shadow of the Eagles. I have posted a brief account of the first test here.

This report will include more info about the rules though not a step-by-step account. I didn’t take enough notes for that. The rules do not specify the number of figures to be used. It does help if your units have four stands each, since a battalion in line rolls 4 dice when firing and in close combat, but as long as both sides are about the same it will work. If you are put off by my figures in single ranks, don’t worry. You can easily use double-ranked figures without any change to the rules. There are standard measurements intended for 20-30mm figures or any that have a battalion frontage of 6-12”. The smaller game is for battalions that have a frontage of 4-8”. 4 inches is the frontage of my battalions so we went with the smaller game. But if you have 10” wide battalions with perhaps 100 smaller figures, go with the standard game.

There is no figure removal; units take hits. They first become weakened (and less effective) and if not rallied, may well rout. Then they are removed from the table after bestowing morale hits on nearby friends. The first two hits cannot be rallied. For example, a regular unit routs after taking the 7th hit.

Players roll for initiative, the winner deciding to move first or second. The turn sequence follows.

First player moves
Second player moves
Second player fires
First player fires
Simultaneous close combat
Rally and then determine if any side has broken.

An army will break when half of the units have routed. What makes this different from many other games is that weakened units count as half a routed unit. So if you have a few routed units and a lot of weakened ones, you may be headed for the showers early.

And now it’s time for the report. Ken wanted to play the British since his dad was born in Old Blighty. I took the French and came on in a frontal attack like Reynier did. Well, not quite as berserk. I did fire back rather than just rush with the bayonet as Compere’s brigade did in the actual fight. Yellow discs indicate weakened units, red discs indicate routed units, which are removed from the table after having their photos taken.


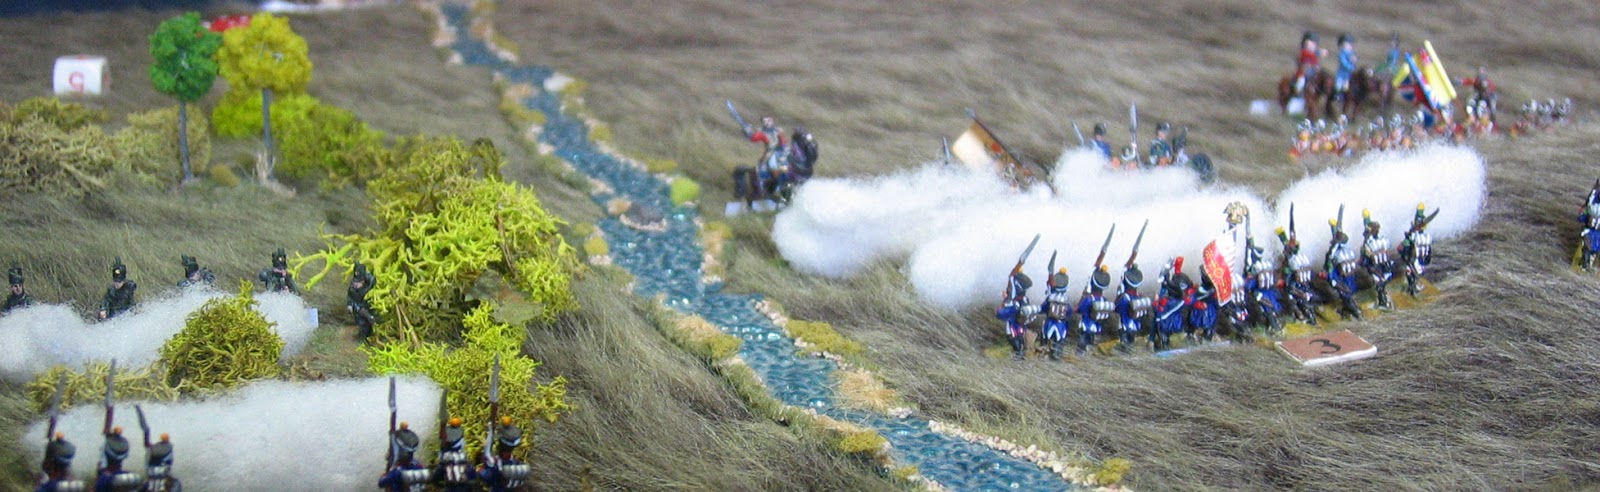
Brigadier Diogonet took the 23rd Legere and the Chasseurs a Cheval on a right hook. What looks like a road is the edge of table. Beyond here be routed units, game markers and monsters.


The British left was in trouble after turn 4, since the 1/20th Foot had not yet shown up.
The 1/20th did show on turn 5. They missed firing on the French cavalry but instead poured withering fire into one of the Legere battalions from behind. When this regiment intervened in much the same way at the real battle, the French called it a day and fell back. But I pushed forward.


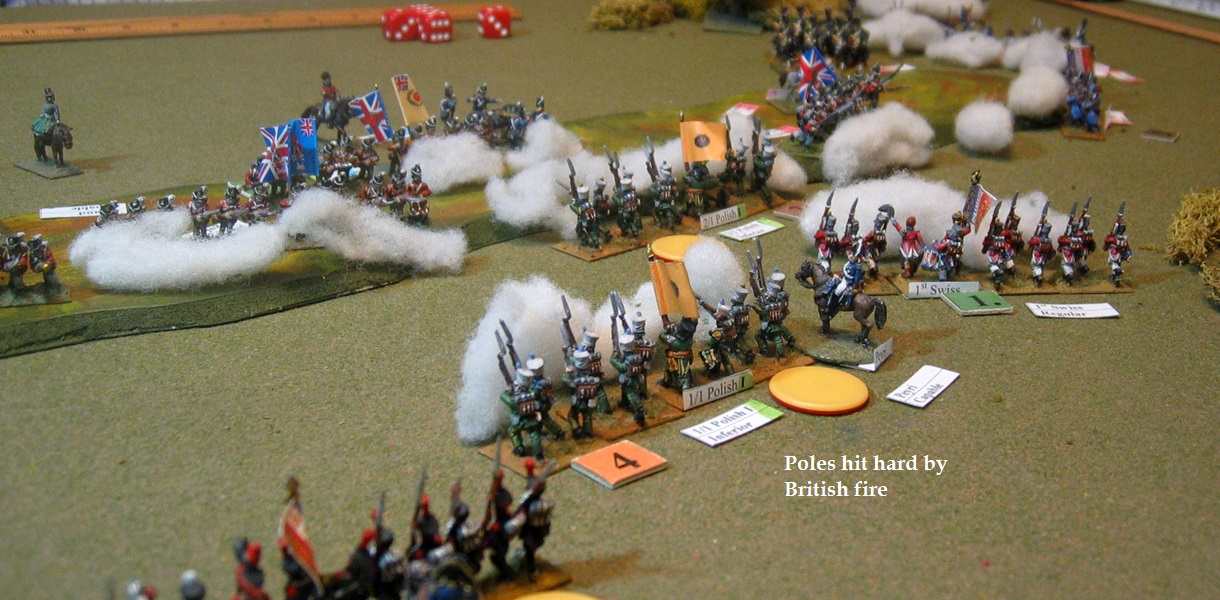


After editing the photos I realized the attack against the square was resolved in error. First, the light cavalry get a -1 modifier vs. heavy or line troops. And even if they beat the square on the first round, the square would hold and the combat be renewed until either the square broke or the attackers fell back. Even if the cavalry had rolled hot enough to break the square the British weren’t near their breakpoint of 5 units. The French had made theirs of 5.5 units.

We played 8 turns in 2 hours, 48 minutes. Not bad considering Ken had not played or read the rules before and required a lot of in-game explanation. The game came to a definite conclusion. I recall many games in my youth called on lack of time to cries of “in another two turns I’d have captured that chicken coop”.

I think the rules need a little tightening. I know my scenario needs some too. We both had a good time. Ken was surprised by his victory. All he saw was the cavalry behind him. I was keeping track of the growing pile of routed French units. Most unusual was having a historical battle play out much like the actual thing.

Sunday, February 9, 2020

Maida 1806, Shadow of the Eagles

I invited Jay to a Saturday game as he has been unable to attend Thursday meetings lately. It was a test of Shadow of the Eagles, Keith Flint’s new work-in-progress Napoleonic tactical rules. I asked him play the British while I would lead the French in a frontal attack like Reynier did. If I was primarily going for a win rather than a test, I’d have a good number of the 4 Legere battalions present go into skirmish order. Instead they went forward in lines or columns. I had generally better dice, keeping the initiative for most of the game. The British regulars were rated as superior when firing. This did not apply to the 3 battalions that were fairly green (according to Hopton’s Maida), the 2/78th, 1/81st and 1/58th.  


I thought the French were about to go under but continued to press the attack, like Reynier in the actual battle. Two things changed; the 23rd Legere began to demolish the British left and the French cavalry moved to the opposite flank and took out the victorious but badly shot-up British.


We were both too banged up to go forward. But the British had lost 4 battalions routed against the French 2. It was clear that the French would eventually rally enough to go forward again and now had a serious edge in numbers. Jay decided to fall back before that happened. The French response was “who will help us bury all the dead?”

We played 8 turns in 3 and a half hours. This was the first time we had played these rules. On one turn when a lot of charges were resolved we were back and forth through the rules. That turn was slightly over an hour. Charges after that were resolved more quickly since we knew the drill. We don’t think we made too many errors. At one point I thought a British battalion had routed but when moving it off the table we discovered it was the Grenadiers. Instead of routing they fell back in bad shape. They were rallied by Stuart (British CO) and went back into the line.

The usual result when breaking an enemy unit was that the friendly unit that had accomplished this needed some R&R before thinking of taking on other enemy troops. Seems right.

Each side got one inspiring brigade CO. Each one of them got to make a double move once in the game, without any great effect.

Glaring uniform errors: The Legere are line troops. The "Polish" are Nassau troops. I don't have Napoleonic Highlanders painted. The British are in Waterloo uniforms. The "Corsicans" are 95th Rifles. I think that covers them all. Hey, I didn't use any WWII troops.

Edit: things we did wrong. The gun crew was supposed to have run for cover with the nearby Grenadiers after firing if the chargers kept coming. We also didn't pay enough attention to the troop quality. That probably did more harm to the British. 

Friday, January 11, 2019

Bailen 1808, BBB


Our first game of 2019 was Mark Smith’s draft scenario for the battle of Bailen, July 20, 1808, wherein Napoleon’s Imperial forces had their first serious defeat. I wanted to play the French since I thought them the underdogs and Rick wanted to play the Spanish so he could command his 1808 figures (aided by some others, including Vendee rebels). Ken decided to go with the Spanish. (All Spanish leaders and units are in italics here and in the photos. Spanish infantry figures are double-ranked on slightly smaller bases. It worked fine.) Dice decided Bill would join me and Jay would be Spanish. The rules were Bloody Big Battles, with a period rule for shock cavalry; such cavalry get an additional +1 in assaults.

Bill got Schramm’s brigade and a cavalry brigade to guard the baggage train (full of loot from Cordova), a thankless task. He also got Dupont to aid his movement rolls. I took Chabert’s and Pannetier’s brigades, Dupre’s cavalry brigade and 3 of the 4 batteries to smash Coupigny’s Division, picked because they only had one battery of guns, where Redding’s Division had two.

Rick played Redding, on the Spanish right, Jay had Coupigny and the left, Ken had Redding’s rear guard. The deployment is below.


A small, veteran French unit was blown away in the fighting. The Spanish suffered too.

All reinforcements on both sides arrived promptly, starting with Cruz-Murgeon’s light infantry on our left flank. There were ominous dust clouds behind us.
The Spanish in front of me were fighting hard.
And now our troubles began.


We broke for dinner, a bottle of wine and the birthday cake my wife had baked for Rick. We then returned to the fray for the last three turns of the game. My photo-journalism wasn’t as tight. Blame the wine. Vedel erupted into the Spanish rear. Bill took over there (definitely more fun than Schramm's last stand) while I directed all of Dupont’s troops. Likewise, Ken moved behind me to command Pena’s Division which was snapping at my heels. I have not seen a scenario before where both sides have major forces arrive behind the enemy.

On turn 7 Vedel was shot by the retreating Spanish rearguard. It was a light wound and our house rules determined he would be back in action in a couple days. I didn’t get the photo, but on turn 8 Vedel’s cavalry charged up Zumacar Grande, rode down a flanked Spanish battery (seizing the objective) and exploited into another Battery and put paid to that. Redding was unhorsed during this charge but he managed to escape. That left them isolated far forward. Schramm’s brigade had been destroyed by this time, so the French cavalry was swarmed but managed to drive off the attack.
The Spanish attempt to recapture El Cerrajon collapsed under artillery fire and a mixed cavalry and infantry charge. Dupre’s cavalry exploited but was repulsed by spent Spanish infantry on the lower slopes of Zumacar Grande.
Hit from all sides, most of Coupigny’s Division was destroyed. Coupigny was badly wounded, out of action for two months. We now had four objectives. If we could hold all four for another turn we had a victory. All of the baggage train was taken by the Spanish. I had forgotten to move Dupont, who was amidst the wagons. His horse was shot but he escaped. I will not dignify the preposterous rumor that he was disguised as a vivandiere with an answer.
I seem not to have taken any pictures of the last turn. Vedel’s cavalry, beset on all sides, turned about and charged Cruz-Murgeon’s Light Infantry, driving them up the hill. This put Zumacar Grande back into Spanish control. Dupre’s tired and disrupted cavalry was hit front and flank by a swarm of Spanish infantry and routed. The game ended in a last-minute tie.

We had played 9 turns in a little under 4 hours. The game moved slowly because we resolved one action at a time, first because the situation was so unusual that everyone wanted to see what was going on. Later on, that and the wine may have slowed us.

French losses were 7 infantry stands gone, 2 more run away, 1 cavalry gone, 1 run off, 1 battery overrun, all baggage lost, Dupont unhorsed and Vedel lightly wounded. Spanish losses were extreme; 18 infantry lost with 3 run off, 3 batteries overrun, Redding unhorsed and Coupigny badly wounded. Before dinner the French losses were higher. The attack by Vedel turned it all around. We had a blast. Everyone enjoyed the highly chaotic game. There was such an array of uniforms on the table that we nearly had "friendly" fire several times. My wife remarked on all the laughing emanating from the room.

I have a couple minor issues with the scenario. In the actual battle, Vedel appeared and was doing serious damage to the Spanish rearguard when a messenger from Dupont arrived to tell him an armistice had been declared. I can’t figure out how to represent that in the game, but having Vedel go amok sure helps the French. Of course, if he had showed up a turn later… The shock cavalry rule certainly gives the French cavalry the kind of wallop they seemed to have had in most of the French-Spanish battles. I do think this should only be effective in open terrain. Last, I’m not sure that the hills Redding deployed on were steep hills. But these are all minor quibbles and I’d rather not spoil the broth with quibbles.

We have played a scenario for Bailen previously with Le Feu Sacre, battalion based rules. I left off Vedel’s and Pena’s troops, ending the game when Pena arrived behind Dupont. That was a good game, but this really opens up the whole game.

We have a game coming up in two weeks, likely a French and Indian War game with Keith Flint’s Simple Seven Years War rules. I have to get working on my proposed BBB scenario for Gaines Mill, 1862. Until then, good gaming to all, may you roll sixes (unless facing me).