The period
from ~1700 to ~1848 is known to wargamers as the Horse and Musket period. Some
use a single set of rules for this period, since infantry use muskets with
bayonets, cavalry uses sabers and lance, and black powder artillery looks
pretty similar. Tactics, drill, weapons and even logistics slowly evolved
during the period. The advent of widely
used rifled small arms and artillery, railroads and steamships spelled the end
of this period.
All internet images have been removed from this post, sorry.
The period
begins with the invention of socket bayonets, which gave the musketeer a cold
steel defense when unloaded. The use of pikes faded, though the Swedes continued
to equip up to a third of their infantry with pikes at the start of the period.
Their aggressive Gå På doctrine, close range fire followed by a cold steel
charge made them the terror of the Baltic region. The Russians finally stopped
them at Poltava with masses of artillery and infantry. But the Swedes are
outliers in this period.
Most
troops used musket fire and artillery to wear down the enemy before closing
with cold steel. Cavalry tended to use pistols at close range before resorting
to sabers. Cartridge boxes carried perhaps 26 to 29 rounds. Extra cartridges had
to be carried in soldiers’ pockets. I recall old rules where musket fire was
based on 2 or 3 rounds per minute. At 3 rounds per minute, an 8 or 9 minute
fire fight would see ammo exhausted. There seems to have been a bit less firing
than the maximum rate of fire indicates. This holds true today. If infantry
just blazed away as fast as possible, they would likely run low in a little
over 5 minutes. At the 1777 Battle of Hubbardton, one Continental unit reported
firing about 20 rounds per soldier during a hotly contested two hour fight. This
indicates sharp encounters separated by lulls in the action.
Flintlock
weapons might misfire as often as one shot in seven. Drawing a live round from
a muzzle-loader is tense work even when no one is shooting at you. I can
testify. Towards the end of the period percussion cap locks would see a slight
increase in rate of fire and a decrease in misfires. A prolonged firefight would
see barrels fouled by black powder residue. This would continue past the period
into the American Civil War and beyond until smokeless powder dominated the battlefield.
Rate
of infantry fire was slowed by wooden ramrods at the start of this period. Load
too fast and they break. Prussian infantry used steel ramrods, less likely to
break. Constant practice allowed them to fire up to 5 rounds a minute. A minute
or two of this would often convince the other side to back off. As the war went
on and attrition told, new recruits usually could not keep up with this rate of
fire. Again, the cartridge boxes would empty even sooner. We see a gradual
increase in infantry firepower due to metal ramrods and improved musket drill.
According to Dominic Lieven, the British historian descended from a Napoleonic
Russian General, Russian infantry firepower suffered from the inferior paper
their cartridges were made with. Minor details can have major results.
During
the War of the Spanish Succession, infantry formed 3 to 4 ranks deep depending on
national doctrine. Infantry companies were administrative organizations, not
tactical units. Infantry battalions were divided into 4 equal divisions on an
as-needed basis, regardless of the number of companies. These divisions were
how the battalion maneuvered from column of march into line.
The Prussians
used strict discipline to constantly drill their troops until they could form
line faster than opposing infantry. Marshal de Broglie figured he couldn’t get
his French to match this. His solution was to break his infantry line into 4
divisions, like those of the infantry battalion. By having all four deploy at
the same time they could be safely in line by the time the Prussians finished their
deploying from a single column. This was the genesis of permanent divisions,
which in time led to the formation of permanent corps. Before this, divisions
above the battalion level and corps had tended to be ad hoc and basically
interchangeable.
The Revolutionary
and then Napoleonic French developed faster drill methods making formation
changes yet faster. At the end of the period chasseur and zouave drill became
even faster, as rifled weapons began to make close-order formations more
vulnerable to fire. Drill evolved during the period, making trained infantry
more flexible.
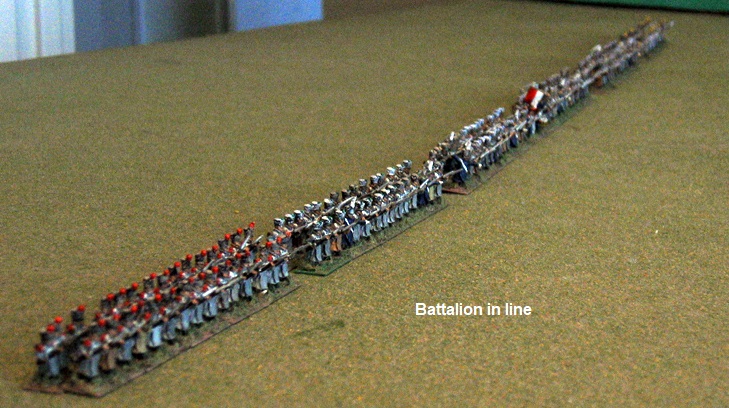
As firepower
increased, infantry formations became shallower. Most nations went to three
ranks. Britain and the nascent U.S. went to two ranks. Note that Wellington,
after seeing the trouble caused by French cavalry in the open terrain at Quatre
Bras, went to 4 ranks deep at Waterloo. Rules giving a firing bonus for two-rank formation need to
be adjusted for that famous battle.
At the
start of the period, some armies had light infantry (notably the Austrian
Grenzers) who fought in loose order, often used in broken terrain and specializing
in raids and such. By the French Revolution the practice of screening formed
troops with skirmishers became widespread. These troops harassed the enemy,
functioning as early warning and advanced guards.
So far,
we have seen a change in infantry firepower, drill and organization. As the industrial
revolution spread, weapons and supplies changed from artisanal goods to factory
produced. While some artisanal products may have been finer, factories produced
more, enabling armies to grow in size. The evolution of advanced capitalist
economies made financing larger armies possible. Increased population from
improved agriculture provided the basic raw material, live bodies.
And now
for the evolution of artillery. Artillery was extremely heavy in 1700. The horse
teams needed to move these behemoths were privately owned. The owners were
eager to get themselves and their valuable horses out of harm’s way when the
lead started flying. The Austrians were the first to use military personnel to
draw the guns. They would not start the battle by running away. Metallurgy improved,
making weapons lighter and gradually more accurate. Consider the following
weights of artillery pieces.
|
M1707
Prussian 3-pounder
|
826
lbs.
|
|
M1707
Prussian 12-pounder
|
3,471
lbs.
|
|
1st
Empire (Gribeauval system) 8-pounder
|
2,137
lbs.
|
|
1st
Empire (Gribeauval system) 12-pounder
|
4,364
lbs.
|
|
M1857
U.S 12-pounder Napoleon gun-howitzer
|
1,227
lbs.
|
As
the period ended, the M1857 gun had the hitting power of the earlier 12-pounder
guns and yet weighed substantially less than the French medium gun, less than a
third of the French 12-pounder. Lighter guns were more mobile and lessened the
burden of gun crews operating the guns. Before the days of hydraulic recoil
mechanisms, guns rolled back with each shot (one of the correct things in that
recent Napoleon film). The crews had to wrestle these heavy guns back into
place after each shot. About the time they ran out of ammo, the crews would be physically
exhausted. Again, rules based on maximum rate of fire deserve a wary eye. John
Gibbon, the Civil War Union artillery expert, considered that a gun crew should
fire one well-aimed shot every two minutes. If they were being directly attacked,
the rate might well go up. Or they should limber up and escape.
We have
dealt with how infantry slowly increased firepower and flexibility, and was covered
by skirmishers at the end of the period. There was a slight bit about increased
supplies, and now lighter, more mobile artillery. We come to the cavalry. I don’t
have nearly as much to report here. There wasn’t much change in horseflesh or
troopers. The increase of infantry and artillery firepower was not matched by horseback
shooting. Better cavalry now tried to close with cold steel before their foes
could get more shots in. irregular cavalry instead opted for raids rather than
battlefield heroics.
Battles
of this period look similar save for uniform fashions. But the pace and
interaction of the different arms evolved during the time, tending towards more
firepower, flexibility, mobility and increased organization at higher levels,
like division and corps.
A
digression: when American Civil War officers talked about Napoleonic tactics,
they weren’t talking about Napoleon I. They were talking about then current
French tactics of Napoleon III’s army. Chasseur tactics and zouave drill were
all the rage. The French army was the leading army in Europe, having bested the
Austrians in 1859 and suppressed the locals in North Africa. The kepi was based
on their uniforms, as were the various zouave units. The Napoleon gun-howitzer
was named for Napoleon III. None of them knew that the emperor and his army
were headed for a big fall.
Further: I was going to post some photos but Google Blogger suddenly is giving me grief about posting photos. Sigh. Maybe the heat got to them.