Thursday evening the Corlears Hook Fencibles played a
scenario of the 1861 battle of First Bull Run using the Bloody Big Battles
rules. I recently decided based on further reading that the scenario needed to
be updated. It now fits on a 4 X 4 foot table. My crude rendering of the map
follows. In the AAR and photos, all Confederate units and leaders are in italics.
All internet images removed from this post, sorry.

Jay and Bill played Johnston
and Beauregard respectively,
while Rick was McDowell and I Tyler. On the first turn I rolled a six to activate
Tyler ’s
division. The rolls weren’t supposed to start until turn 3 (noon). There’s no
excuse since I wrote the scenario. This error was in the Union ’s
favor. More on that later. The main Union column got into a fight with Evan’s small, isolated brigade.


Schenk’s small brigade sidled up to the Stone Bridge
over Bull Run , one of the 5 objectives on the
field. Possession of three would grant victory. Cocke didn’t intervene because Keyes was threatening Ball’s Ford,
another objective.


Confederate reinforcements
began arriving.


Hot Union firing dice decimated Evans’ brigade which was then swept away by Burnside’s bayonet
charge.


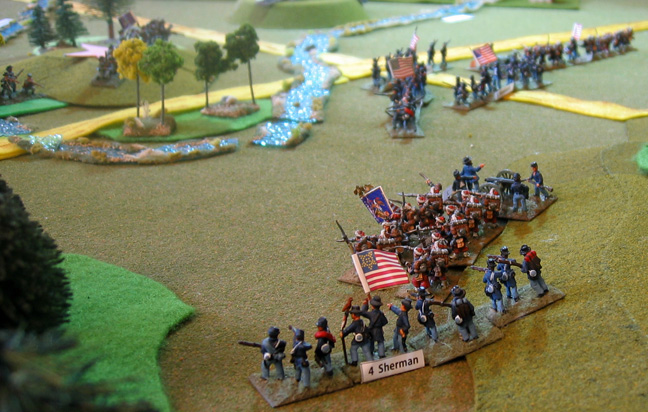
Burnside rested while Sherman
moved up.
Burnside advanced and was disrupted by artillery fire.


On turn 6 the Confederates
realized they had forgotten to bring on their previous turn’s
reinforcements, Stuart and an artillery battalion. It all arrived this turn along with Early’s and Kirby-Smith’s brigades.
A sobering mass of enemy troops appeared behind the Confederate left.


For the moment, the Union held three objectives (Ball’s
Ford, Stone Bridge


Union fire decimated Bee’s
brigade. A charge up the hill did more damage with musket fire but then
fell into confusion (assault dice of Union 1, Confederate 6). The battered Rebels just held and threw Porter’s
brigade back.


Wilcox rallied and charged, as did Burnside. Heavy fire
stopped both charges.

On the final Confederate
turn, Jackson Franklin ’s
brigade, removing all traces of Union control from Henry House Hill. With only
one objective, the Union had lost the game.
But insult was added to injury. Early defeated
Howard, Stuart’s cavalry charged
Porter’s flank, forcing the much larger Union brigade to give ground. They
stuck a fork in us. We were done. No photos were taken at the end of the game. In the ensuing rout, the photographer's "whatsit" wagon was overturned.
We played nine turns in two and a half hours. Union losses
were 8 infantry bases and 1 ran away (of 37). Confederate losses were 7 bases of infantry and 1 ran away (of 35).
Everyone had a good time. All agreed that the Union
had a tough but not impossible job in this scenario. The Union attack on Bald
Hill was made feasible by some hot firing dice, giving us a really good shot at
winning the assault. But our luck gave out. Considering my early error in
favor of the Union and the Confederates
forgetting to bring on some reinforcements in a timely manner, the odds do seem
against the Union . This has me thinking of
ways to even the odds a little. I don’t want to add a Union general to the mix
since none of the high ranking officers performed better than battalion
commanders that day. Perhaps Sherman
should get an upgrade since his brigade performed markedly better that day.
I’ll think about it over the weekend.
All agreed that we will switch sides and play this again
next week. Stay tuned.
3 comments:
That sounds cracking! Is the scenario in the group files the "redone" version you used for this?
Also, how did you do the map...
Please excuse the delay. I was out of town.
This is not the version in the files. If the new version passes muster Thursday it will be moved into the files.
I made a jpeg copy of the map in the file scenario and then erased stuff and added stuff using Microsoft Paint.
Ah, excellent - I really must work out how to put a coloured background behind the maps and then look at more banner printing!
Will await the new scenario :)
Nathan
Post a Comment