Friday, April 28, 2017

First Bull Run (again)

Thursday evening the Corlears Hook Fencibles played an updated version of our First Bull Run scenario using the Bloody Big Battles rules. Some changes were made to the scenario since last week. We switched sides for this game. Bill and Jay tried to put down the rebellion while Rick and I fought for independence, state’s rights and the peculiar institution. The extra troops in Smith’s large brigade of last game were peeled off and fielded as Kershaw’s small demi-brigade. Confederate units and leaders are in italics in this report and photos.

Things went off quickly as the Union decided to make an end run around Matthews Hill with Porter’s brigade and the artillery.
Burnside and Evans both became spent in a nasty fight.
The rapid Union movement slowed down. Burnside spent a number of turns recovering from the carnage on Matthews Hill.


Things heated up around Henry House Hill.


And then…


Keyes was sent about his business.


Both sides packed troops onto Henry House Hill. The Union had only one objective, the Stone Bridge. They needed two for a tie and three for a win.


The Union was unable to clear Henry House Hill of Confederates. The Union lost again but all agreed that it had been close and if a few things had gone the other way it might have been a tie or even a Union victory. It is balanced in favor of the Confederates but they did win the actual battle.

It took a little under 3 hours for us to play 9 turns. Union losses were 7 infantry stands and 1 run off (of 37). The Confederates lost 7 infantry stands, 1 run off (of 36) and 1 artillery battalion blown up.

 I’ll send the updated scenario to Chris. That will be all for a while as my wife and I will be out of town for a bit. I may post some rambling stuff here but no battle reports until June. Adios, amigos.

Friday, April 21, 2017

First Bull Run 1861

Thursday evening the Corlears Hook Fencibles played a scenario of the 1861 battle of First Bull Run using the Bloody Big Battles rules. I recently decided based on further reading that the scenario needed to be updated. It now fits on a 4 X 4 foot table. My crude rendering of the map follows. In the AAR and photos, all Confederate units and leaders are in italics.

Jay and Bill played Johnston and Beauregard respectively, while Rick was McDowell and I Tyler. On the first turn I rolled a six to activate Tyler’s division. The rolls weren’t supposed to start until turn 3 (noon). There’s no excuse since I wrote the scenario. This error was in the Union’s favor. More on that later. The main Union column got into a fight with Evan’s small, isolated brigade.

Schenk’s small brigade sidled up to the Stone Bridge over Bull Run, one of the 5 objectives on the field. Possession of three would grant victory. Cocke didn’t intervene because Keyes was threatening Ball’s Ford, another objective.

Confederate reinforcements began arriving.

Hot Union firing dice decimated Evans’ brigade which was then swept away by Burnside’s bayonet charge.

Burnside rested while Sherman moved up.
Burnside advanced and was disrupted by artillery fire.

On turn 6 the Confederates realized they had forgotten to bring on their previous turn’s reinforcements, Stuart and an artillery battalion. It all arrived this turn along with Early’s and Kirby-Smith’s brigades. A sobering mass of enemy troops appeared behind the Confederate left.

For the moment, the Union held three objectives (Ball’s Ford, Stone Bridge, Henry House Hill). If we kept them we had a victory. The situation at Ball’s Ford deteriorated.

Union fire decimated Bee’s brigade. A charge up the hill did more damage with musket fire but then fell into confusion (assault dice of Union 1, Confederate 6). The battered Rebels just held and threw Porter’s brigade back.
Sherman’s battered brigade fell back. Jackson’s brigade advanced and forced Wilcox to fall back. Henry House Hill was still in Union hands but just barely.
Wilcox rallied and charged, as did Burnside. Heavy fire stopped both charges.
On the final Confederate turn, Jackson defeated Wilcox. Smith whipped and scattered Franklin’s brigade, removing all traces of Union control from Henry House Hill. With only one objective, the Union had lost the game. But insult was added to injury. Early defeated Howard, Stuart’s cavalry charged Porter’s flank, forcing the much larger Union brigade to give ground. They stuck a fork in us. We were done. No photos were taken at the end of the game. In the ensuing rout, the photographer's "whatsit" wagon was overturned.

We played nine turns in two and a half hours. Union losses were 8 infantry bases and 1 ran away (of 37). Confederate losses were 7 bases of infantry and 1 ran away (of 35). Everyone had a good time. All agreed that the Union had a tough but not impossible job in this scenario. The Union attack on Bald Hill was made feasible by some hot firing dice, giving us a really good shot at winning the assault. But our luck gave out. Considering my early error in favor of the Union and the Confederates forgetting to bring on some reinforcements in a timely manner, the odds do seem against the Union. This has me thinking of ways to even the odds a little. I don’t want to add a Union general to the mix since none of the high ranking officers performed better than battalion commanders that day. Perhaps Sherman should get an upgrade since his brigade performed markedly better that day. I’ll think about it over the weekend.

All agreed that we will switch sides and play this again next week. Stay tuned.

Friday, April 14, 2017

Gettysburg Finale

Thursday evening we completed our Gettysburg game using the Bloody Big Battle rules. Jay led the Confederates and I the Union forces. The other Fencibles were unable to make it. There was one daylight turn left for July 2, a night interval turn and three daylight turns for July 3. Confederate units and leaders are be in italics in this report and the photos.

Near the end of our last session the Union had held all objectives save one: Rodes & Pender had seized a toehold on Cemetery Hill, driving Steinwehr back. The Union moves first each turn in this scenario. Wadsworth’s veteran division (including the Iron Brigade) got a full move. They deployed and charged the Confederates. Doubleday’s division didn’t charge due to staff foul-ups (low movement dice) but did fire in support. Confederate defensive fire was ineffective.  Williams’ division moved off Cemetery Ridge and poured flanking fire into the enemy infantry. Some artillery joined in on Wadsworth’s right. High fire dice saw all the Union troops go low on ammunition, inflicting grievous losses to Pender’s division and leaving them spent. It looked like the counter-attack was off to a fine start. But something (a roll of 1) went wrong with the attack. It was met by spirited resistance (a roll of 5) and the attack was thrown back by the battered Rebels.
More smoking fire dice saw the attackers of Culp’s Hill thrown into confusion, stopping any attack before nightfall.
Note all the low on ammo markers - .22 caliber shells.
And III Corps kept their grip on the Peach Orchard that they had recently recaptured.
During the night, Rodes & Pender fell back from Cemetery Hill to Gettysburg. Pickett arrived and deployed facing south between the Emmitsburg road and Plum Run, waiting for the possible arrival of Union cavalry.
The next day, Union attempts to dig rifle pits at the Peach Orchard and Little Round Top failed. Barnes’ division did dig in on Culp’s Hill. Kilpatrick’s cavalry arrived on the Emmitsburg Road. Skirting Pickett, they hit 1st Corps artillery from behind. One battalion was ridden down and the other three were chased off.
Doubleday moved into the rifle pits on Cemetery Hill that had been abandoned overnight. Photo label below is in error – Wadsworth will be called on to relieve Doubleday, not counterattack.


Pickett’s powder must have been wet as little damage was done to the Union cavalry. They rallied on the next turn and rode into the Union lines, losing one base to fire. Jay could have caused them to halt anywhere along their march but decided he’d rather have them back in Union lines than blocking his path to an objective with only a few daylight turns left.
Five Confederate artillery battalions deployed northeast of Gettysburg and began doing serious damage to Barnes’ troops on Culp’s Hill. Union guns tried to stem the tide.

Most Confederate troops in Gettysburg failed to move out, leaving Heth’s division to try to recapture Cemetery Hill.
Ewell’s corps got ready for the final attempt.

Near the Peach Orchard, Anderson’s division was scattered by heavy fire.
Union artillery behind Culp’s Hill did manage to silence two Confederate artillery battalions, damaging one. This didn’t stop the rain of shot and shells on Culp’s Hill.
The two spent Union divisions collapsed under heavy pressure.
Every other objective was held by Union troops.
This Union artillery must be German immigrants from Bavaria. (We ran low of artillery)

The Balloon went up over the battlefield. Each casualty marker shows where a base was removed by fire or assault.

The loss of Culp’s Hill resulted in a sanguinary tie. My artillery had been used well around Little Round Top, less so at Culp's Hill. The well served Rebel artillery at Culp's Hill stole my tenuous victory.

Union losses were 17 infantry bases lost, 2 ran away (of 73), 1 cavalry base lost. Confederate losses were 18 infantry bases, 2 ran away (of 58) and 1 artillery base lost. Losses were about even and for once, less than the actual combatants suffered in the battle. 


We took a little over 4 hours to play 4 daylight turns and one night interval. It would have gone faster with more hands involved but we wanted to finish the game. It was an exciting session, going down to the wire on the last turn. Jay noted my firing dice had been smoking during the last session while my movement dice left much to be desired. We would gladly play this scenario again. I may make a canvas mat for this scenario – after I finish the Marengo mat. We also agreed that a tie in game turns still wasn’t good for Marse Robert. He needed a win, being so deep in Union territory with a vestigial supply line.


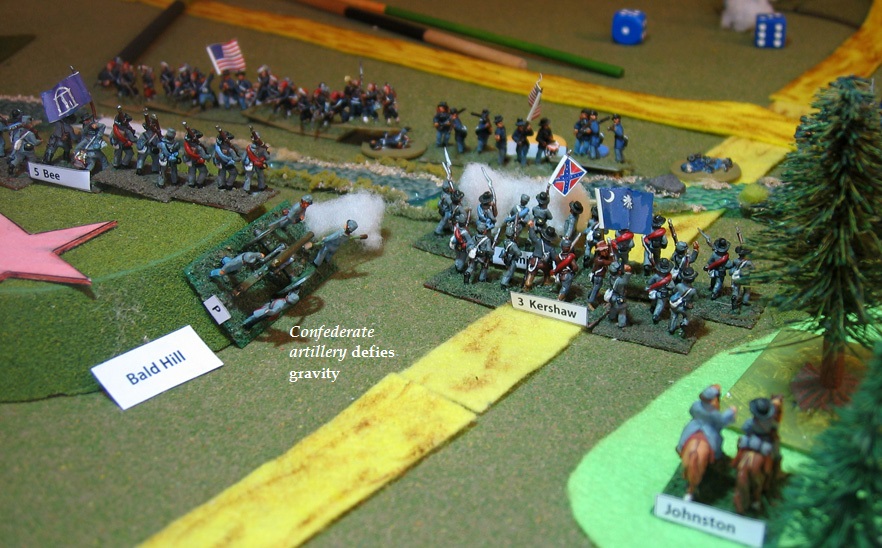
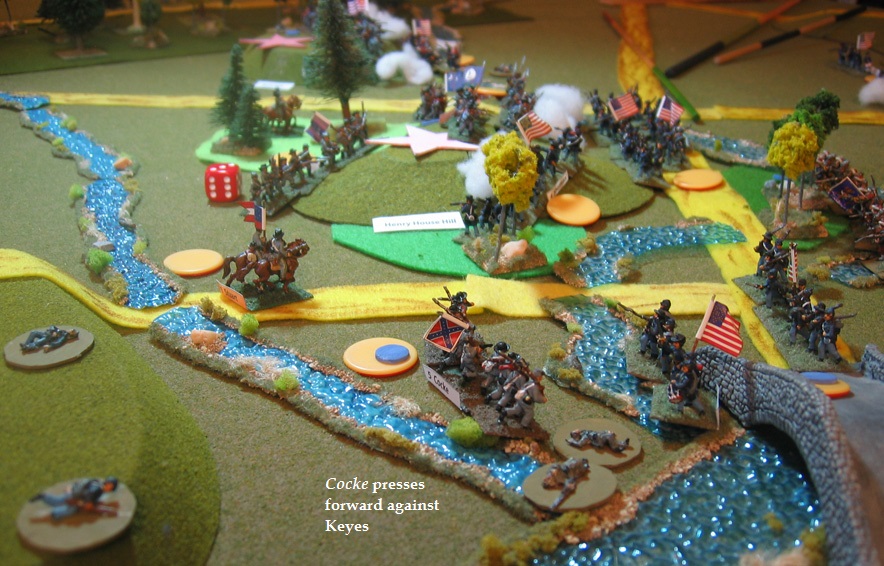
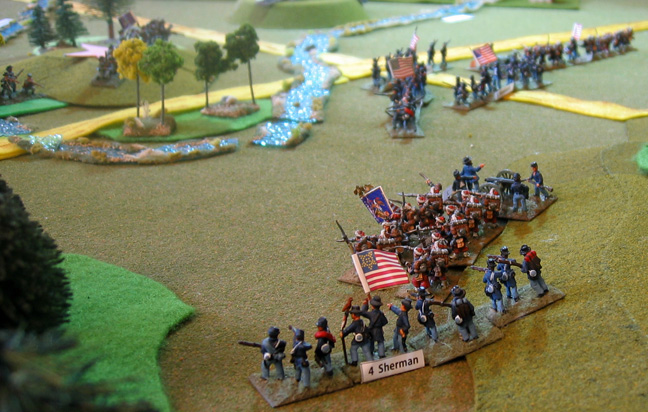
Perhaps next time we’ll shift back to the amateur armies 1861 at First Bull Run.